Reviews
Warranty Information
Lifetime Warranty



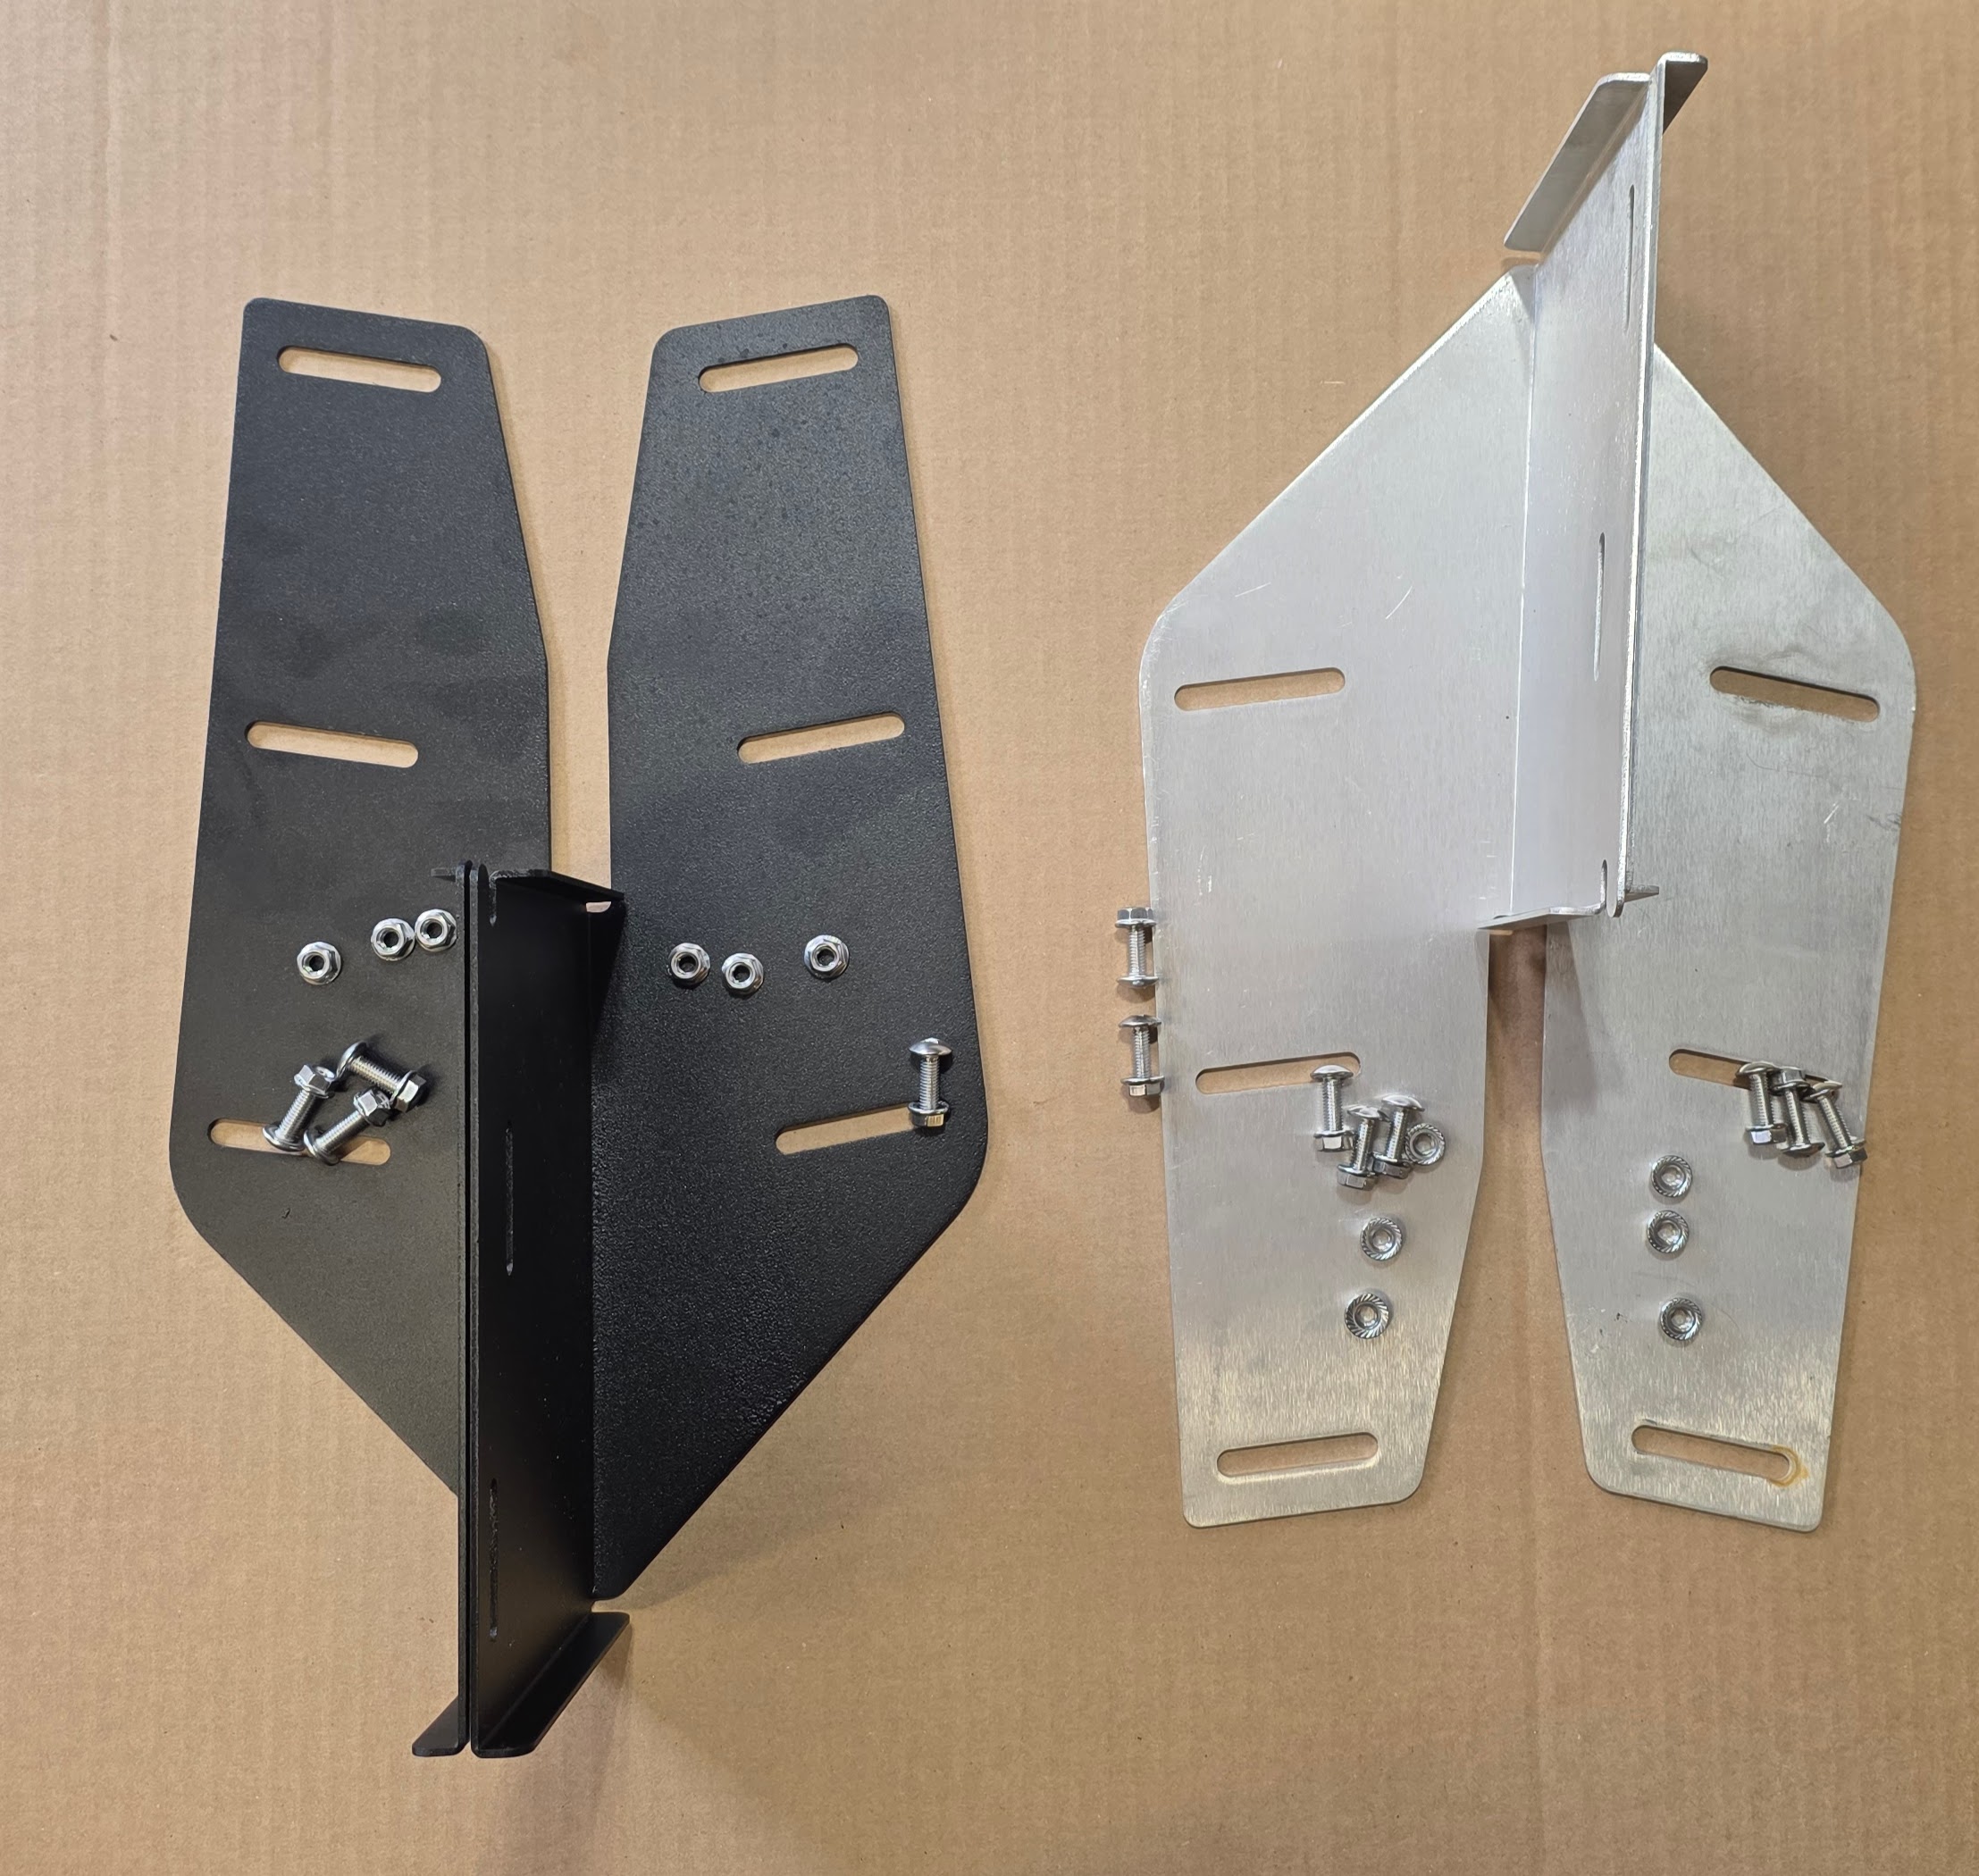
The classic Defender mudflaps are an iconic part of the Land Rover look, and the D2 never got them. This kit fixes that — CNC-bent 5052 aluminum brackets that hang full-size Defender flaps at the factory mounting locations, slotted in two axes for lift and tire size. It costs more than a set of factory replacements. It also clears rock sliders the factory flaps physically won't, covers better than twice the area, and puts aluminum where the stamped steel brackets rust out on every D2 that sees winter road salt.
The Defender flap is one of the most recognizable pieces on the vehicle, and it does something to a D2 that no other bolt-on does at this price — it squares the truck off and finishes the stance. We were always a little jealous the Discovery never got them.
Nothing in this kit touches the face of the flap. The logo stays exactly as it left the mold, whether you run genuine Land Rover flaps or an aftermarket set.
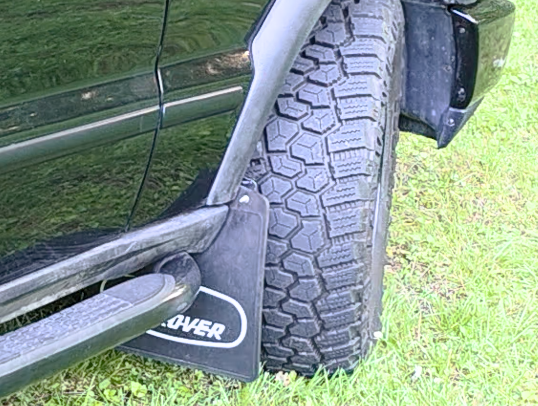
1. It clears rock sliders. The factory front flaps don't.
If you've put sliders on your D2, you already know the factory front flaps don't work with them. There is no factory answer to this — most people give up and run without fronts. Our kit bolts up tight to the fender opening for maximum clearance and the two-axis adjustment slots let you position the flap where it covers whatever tire size you run. This is the reason a lot of built trucks end up here.
2. The factory front brackets rust out. Aluminum can't.
The factory front bracket is stamped steel and it corrodes from the inside. Anywhere they salt or brine the roads it's a question of when, not whether — and when it goes, the flap folds under, catches, and finishes tearing itself off.
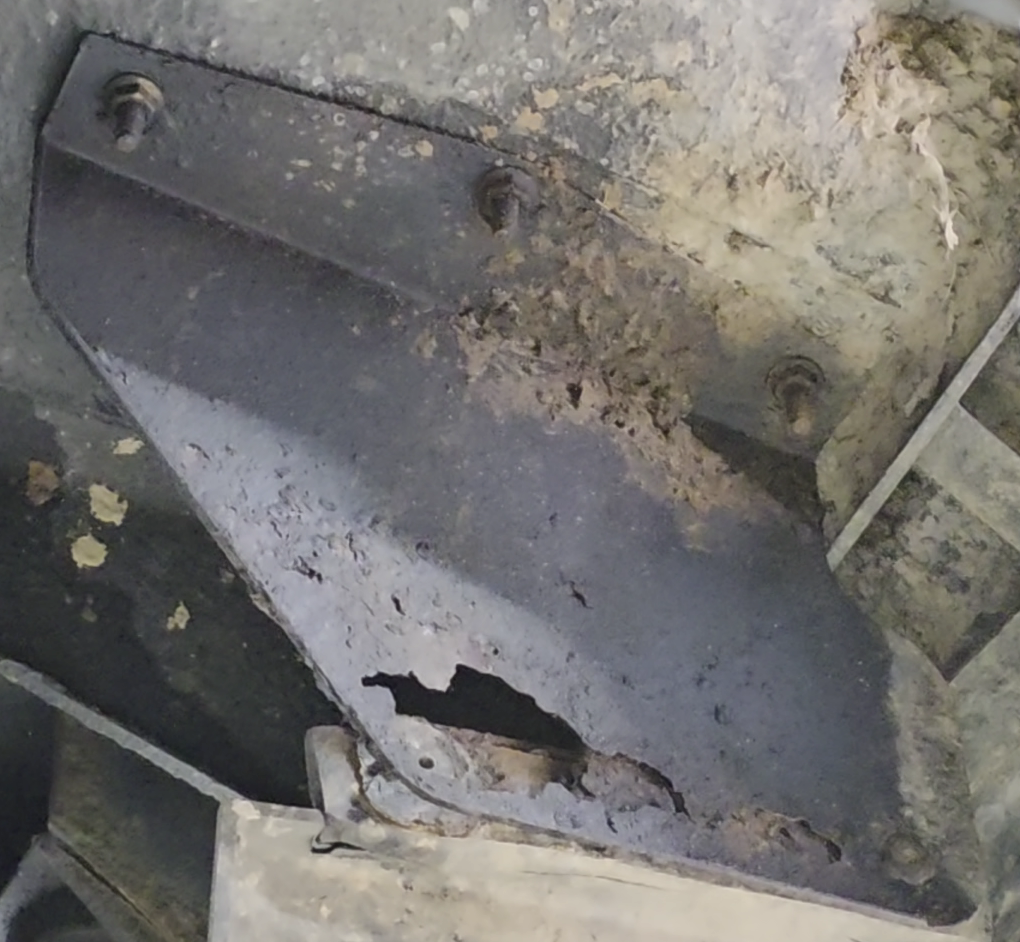
Our front brackets replace that part outright with 5052 aluminum. If you were going to buy replacement brackets anyway, you're comparing this kit against that cost, not against zero.
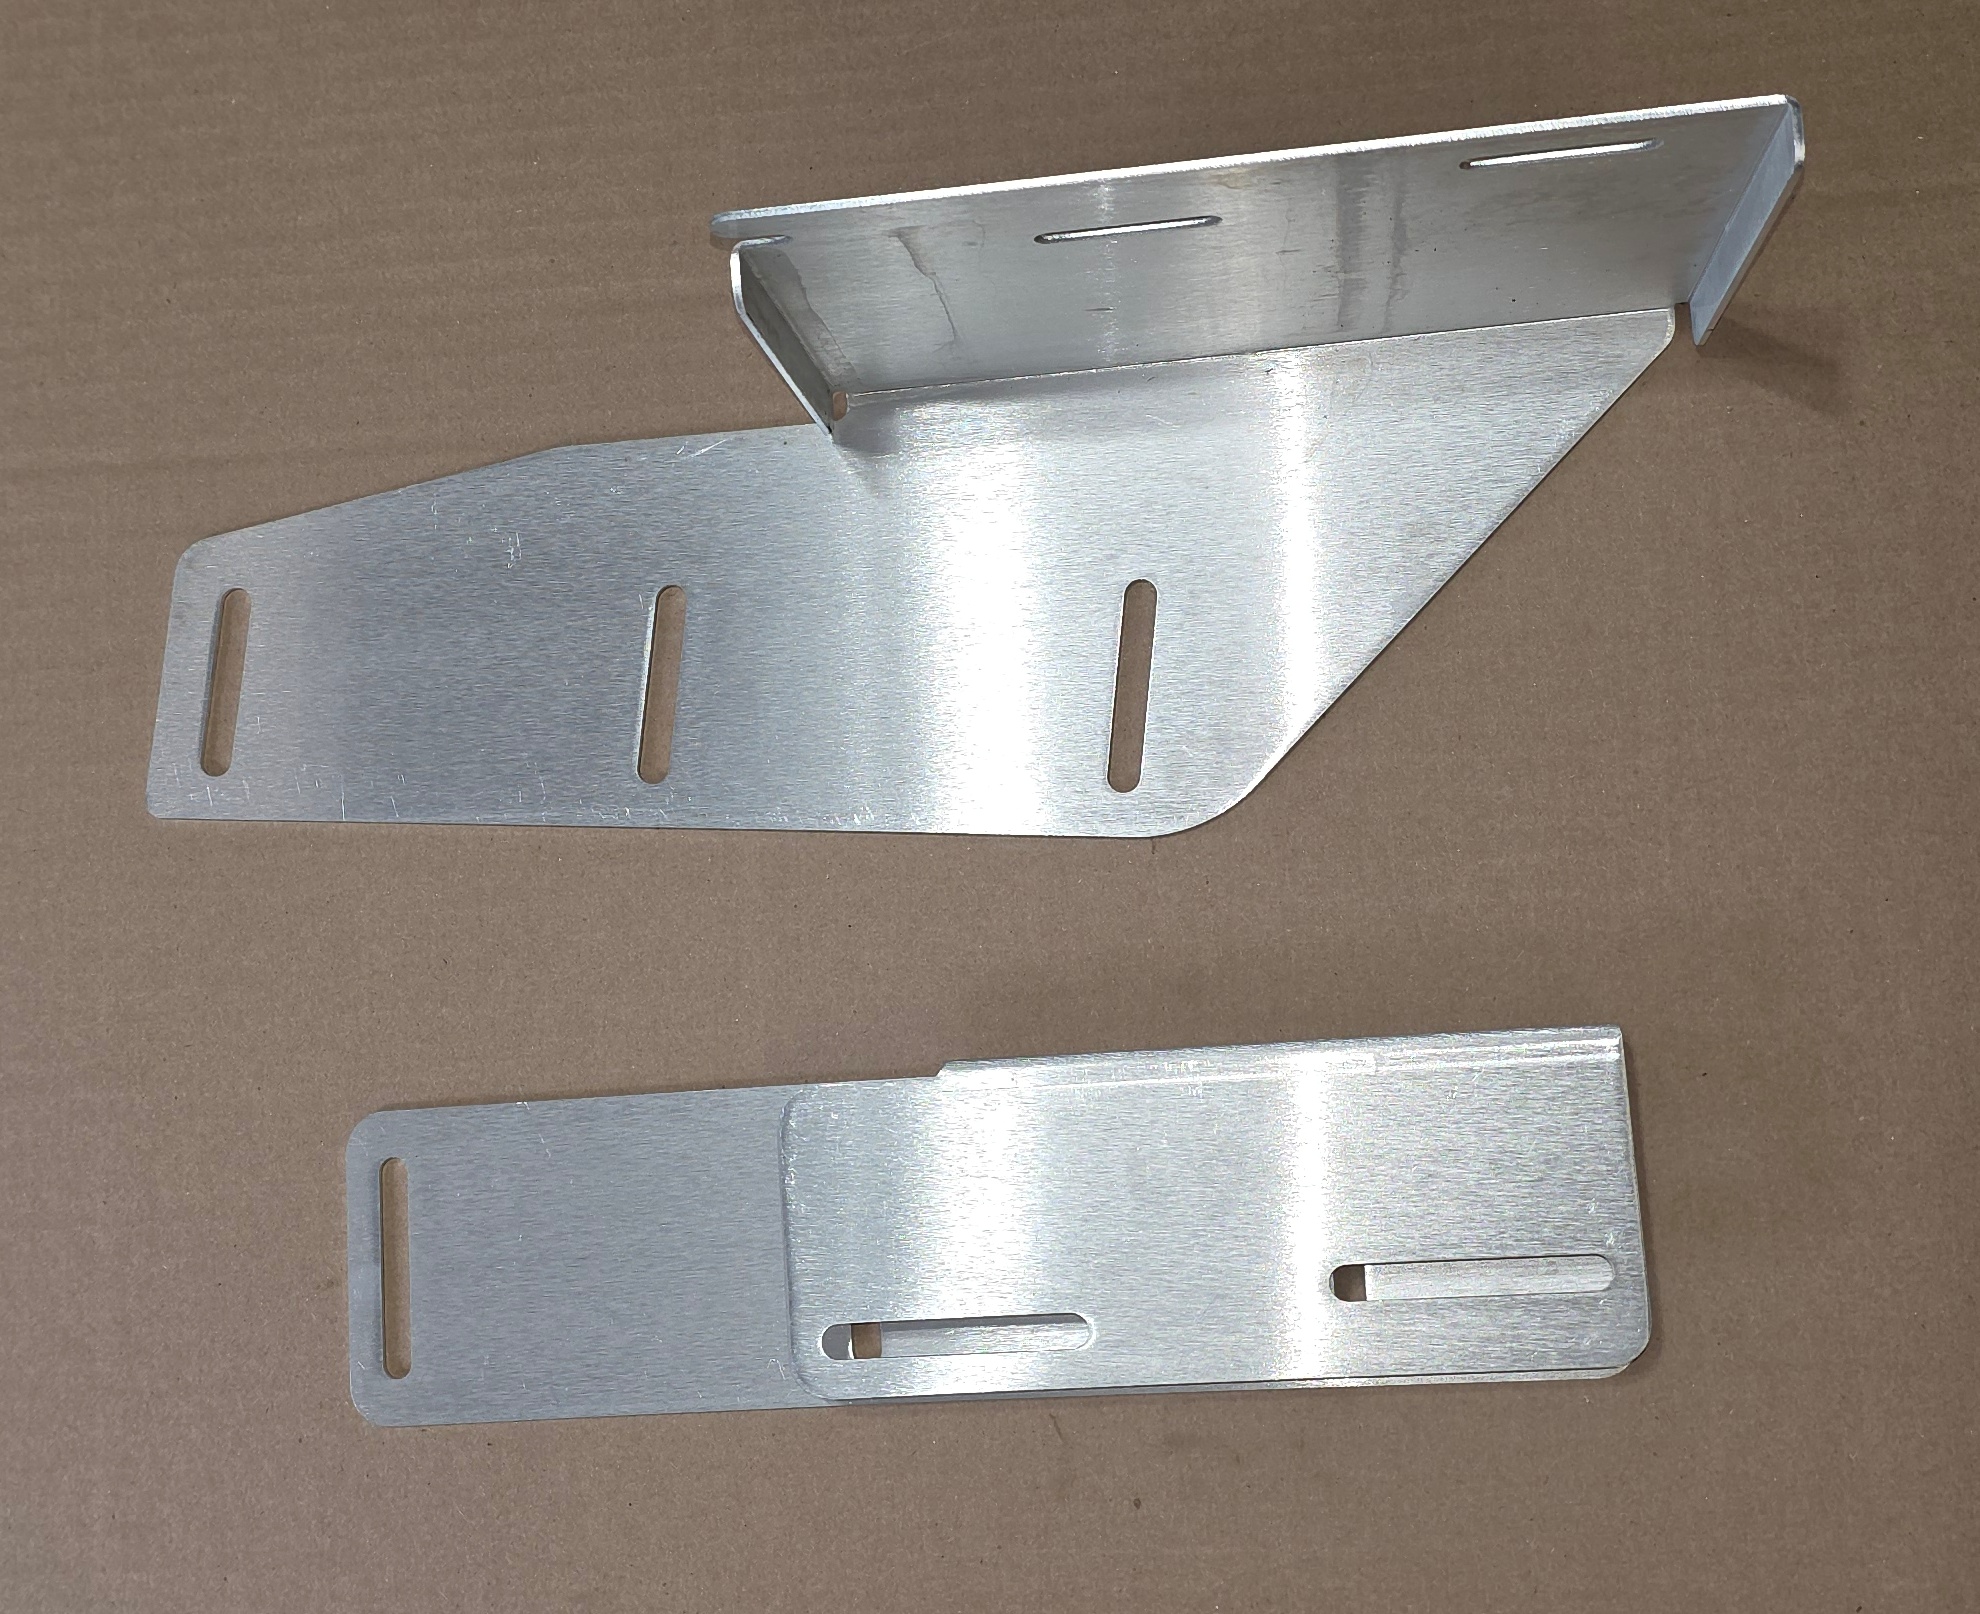
3. Better than twice the coverage — in rubber that doesn't tear.
The Defender flap is roughly twice the width and twice the height of the D2 piece. And where the factory flap is thin plastic — about 3.5 mm — the Defender flap is a full 7 mm of heavy rubber. That's twice the material, and it's exactly why the Defender flap doesn't split while the factory one tears along its top edge after a season or two. More flap in more places means less mud on your rockers, your doors, and you and your passengers clothing.
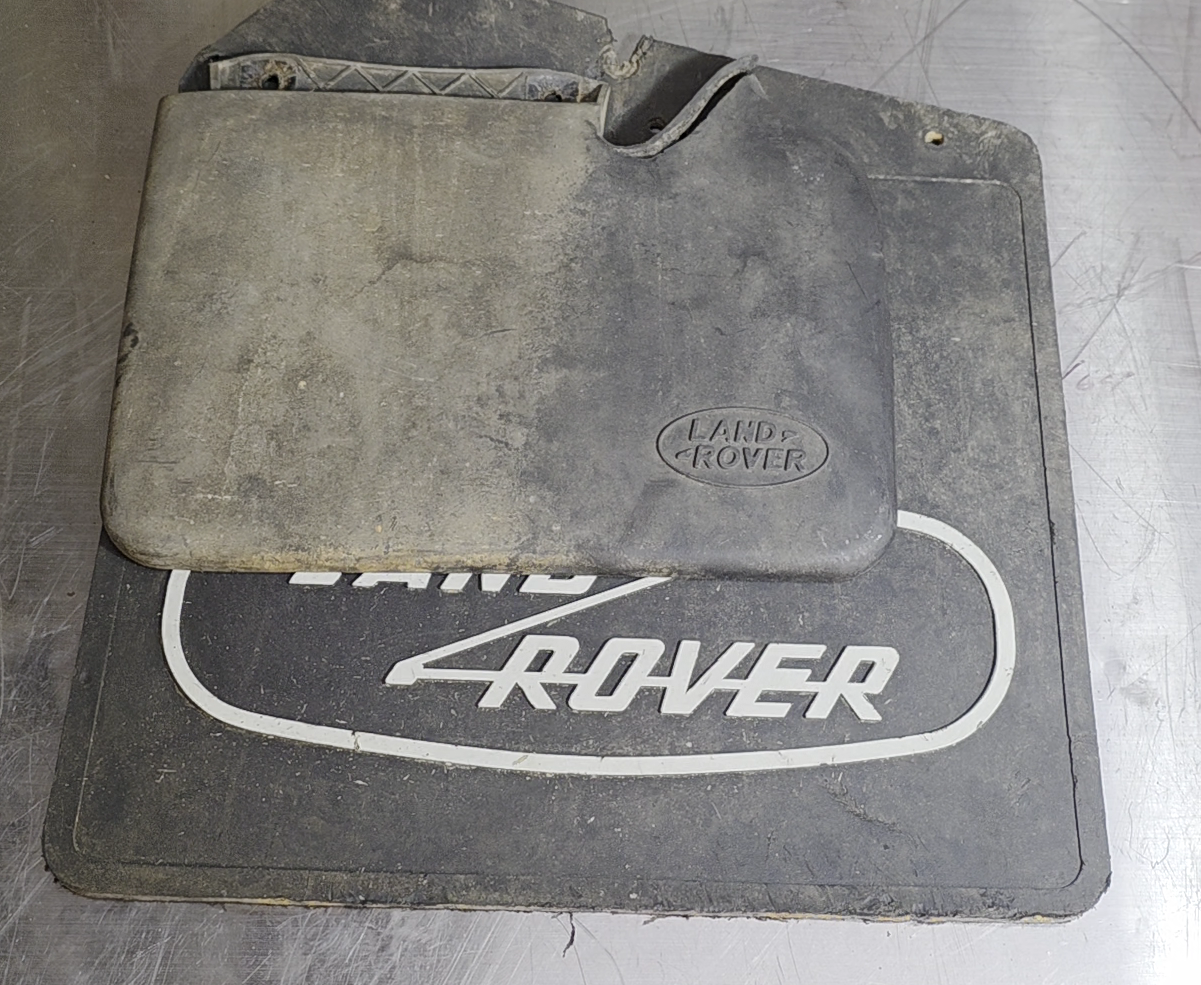
4. In the salt belt, it keeps the winter brine off the truck — and off you.
On the trail, you dress for mud. Commuting to work in January, you don't. But every salted mile throws a brine slurry off your tires and onto the rockers, the lower doors, and the steps — the exact surfaces you brush against every time you climb in and out. A full-size Defender flap intercepts far more of that spray than the small factory flap, so less of it lands on the body, less on the step, and less on your work clothes. It's the difference between a truck you can get into in good pants and one you can't.
Rubber flaps are not included. See the FAQ below for why — the short version is that you can almost certainly source them cheaper locally than we can ship them to you.
Front pair, rear pair, or the full set — your choice, in bare aluminum or satin black powder coat. Buy what you need. If you're running 35s you don't need the rears at all (see fitment below).
The short version: up to 265s unlifted, or as big as your lift allows.
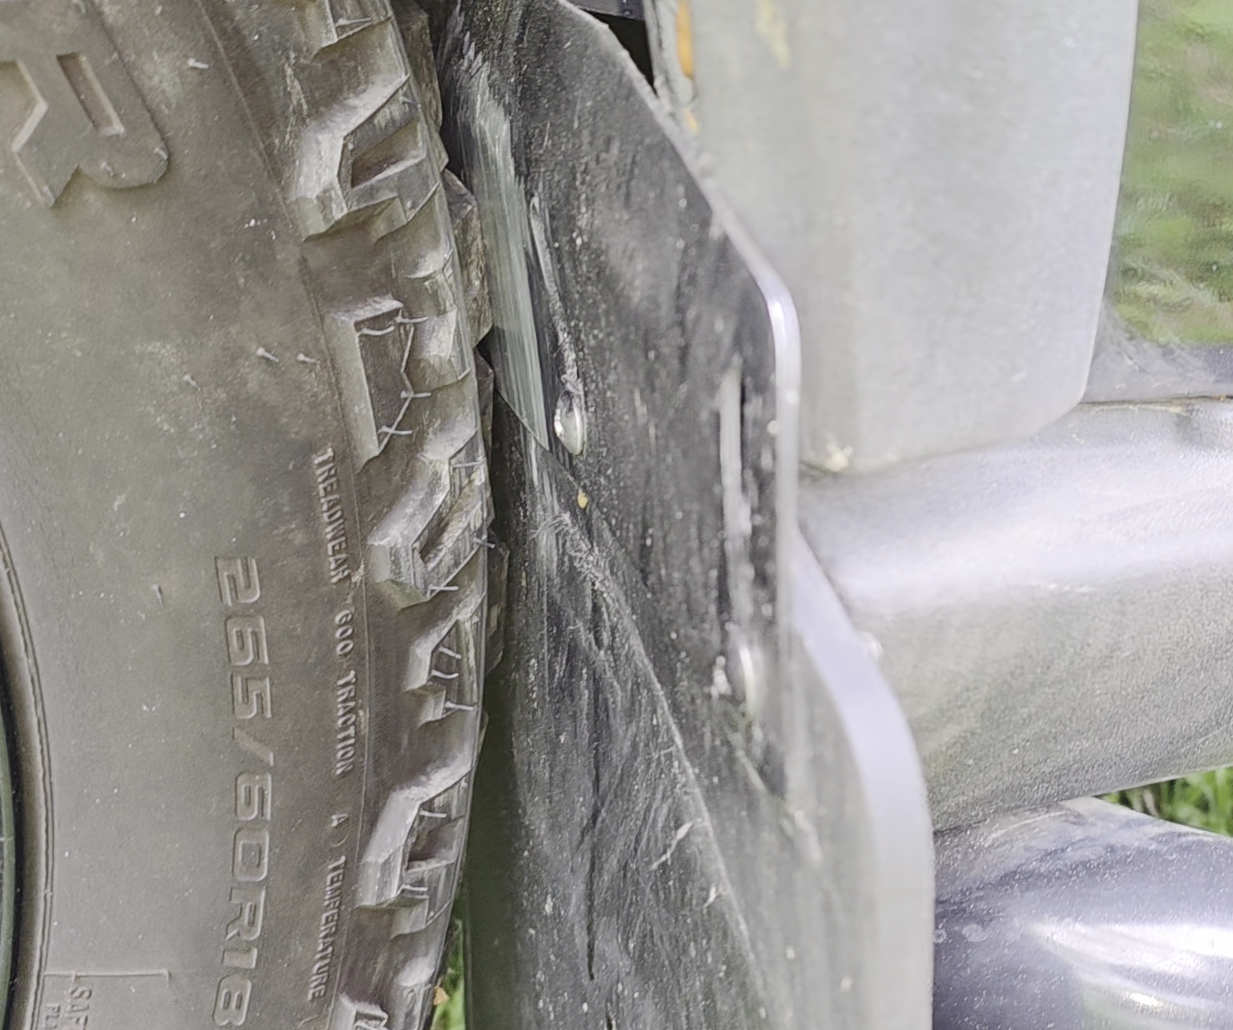
Coverage vs. clearance are two different things. The two-axis slots let you slide the bracket outward to catch the throw off a tire as wide as you want — that's coverage. Whether that tire clears your truck is the list above, and it comes down to lift. Match the flap position to the tire you're actually running.
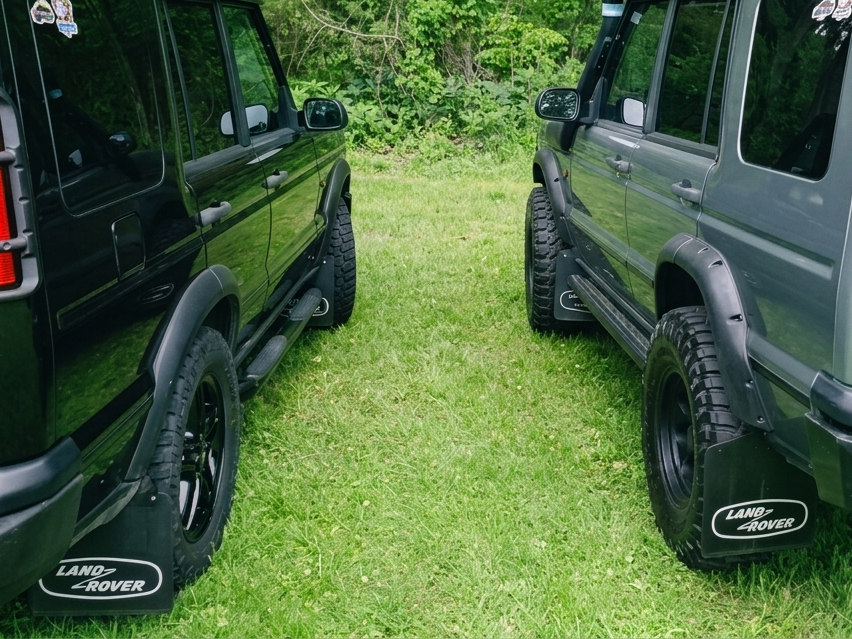
Front: remove the factory bracket and bolt ours to the same body studs. Set the slots where you want them and torque down.
Rear: the factory flap is riveted to the factory rear bracket. Pull the bracket off the truck first, then drill the rivets out or cut them off with an angle grinder on the bench. Fighting the rivets in place is harder than it needs to be and puts your safety at risk.
One more thing the aluminum buys you: beyond never rusting, it means you can fine-tune the bracket by hand — run it with the out of the box bend on stock tires or lifted trucks - squared up to the rocker trim with a clean fit, or tweak it on an un-lifted truck on larger than stock tires a little more tire clearance — with no heat and no special tools.
Bare is mill-finish 5052 — corrosion-immune, but silver. If you want black, scuff it and shoot it; rattle can takes fine on aluminum. The satin black powder coat option is the same bracket with that step already done, to a finish that outlasts spray paint and won't chip when a rock finds it.
Give the D2 the flaps it should have had from the factory — on brackets that outlive the truck.
Every Discovery 2 owner knows the look: the fat, squared-off Defender mudflaps that finish a truck's stance.
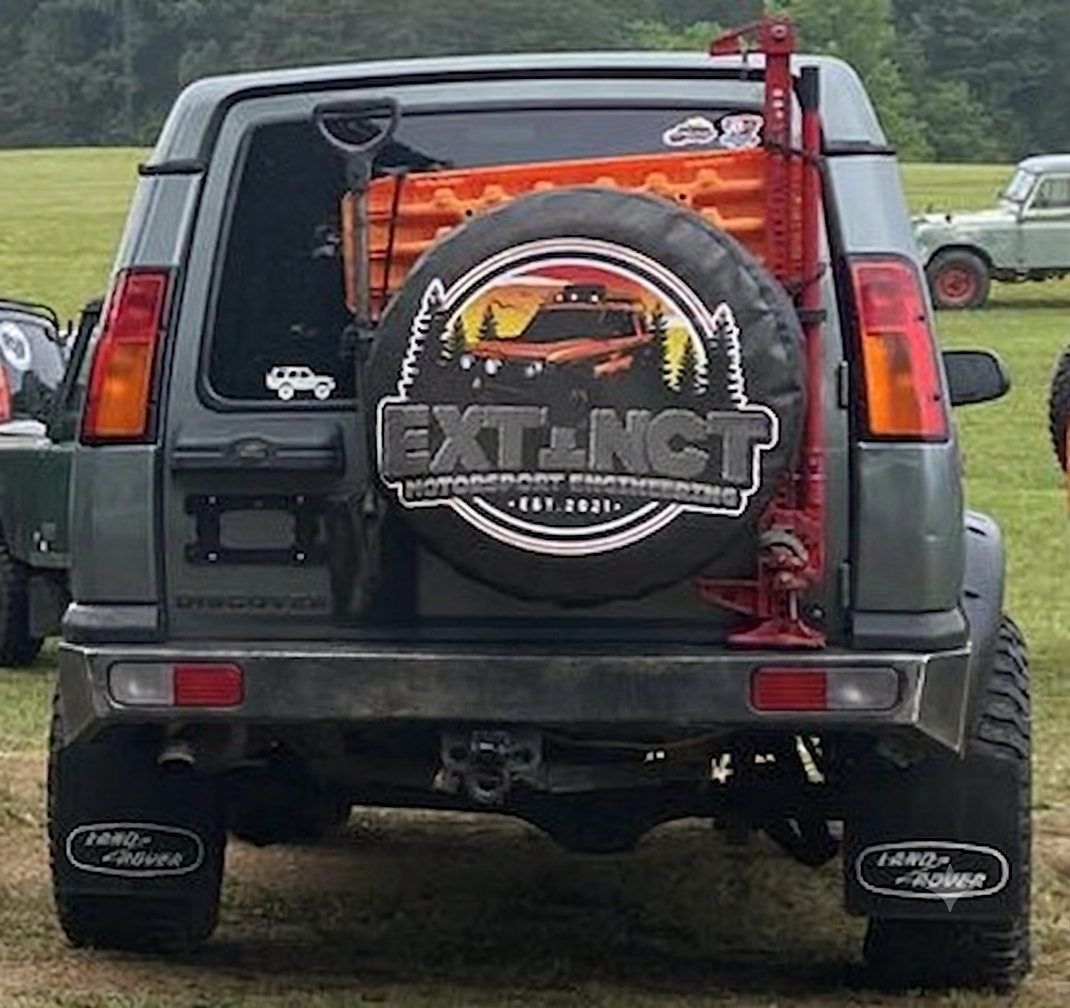
Land Rover bolted them to the Defender and never gave the D2 a set worth running—and by now, the thin plastic flaps you did get are cracked and torn along the top edge, exactly like every other D2 on the road.
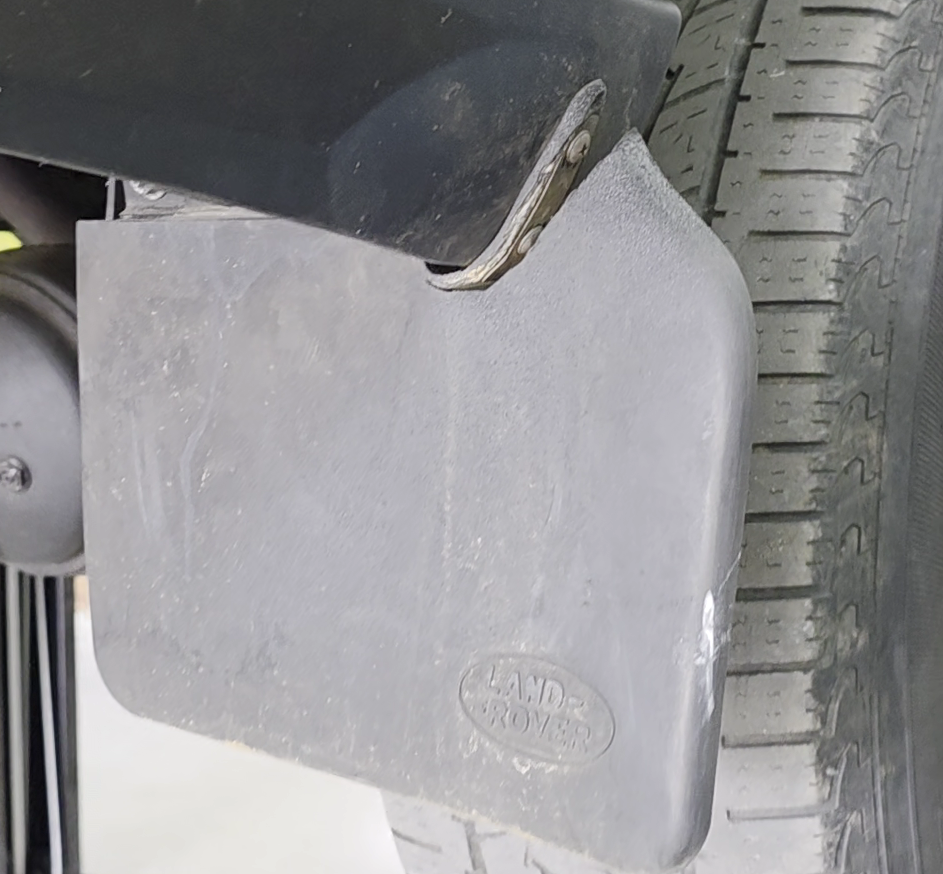
Maybe yours haven't let go yet. They will. Land Rover cheaped out on the plastic, so the factory flaps fatigue and split after a season or two—and the stamped-steel brackets behind them rust from the inside out anywhere the roads see salt. You're replacing those flaps sooner or later. The only real question is whether you put back the same thing, or bolt on a set that looks right, covers twice the area, and never rusts again.
Our Aluminum Defender Mudflap Mount Kit gives your D2 the flaps it should've had from the factory—on brackets that outlive the truck:
See the difference for yourself:
Do it once, do it right, and give your D2 the stance it's always deserved—front pair, rear pair, or the full set, your finish, your call.

Click here to learn how to get combined shipping with an Inline Thermostats order
Yes — and this is one of the main reasons the kit exists. The factory front flaps don't work with rock sliders, and there's no factory fix for it. These mount forward of the slider at the edge of the fender opening. The two-axis adjustment slots let you set the flap based on your tire and lift setup, so if you are lifted and wider, you can make sure the flap catches the fling off. Works with factory step bars too.
Any flap using the standard 07-16 Defender front flap mounting pattern. Two genuine Land Rover series are common:
Heritage — white logo lettering:
Front RH: LR069266
Front LH: LR069267
Standard — non-white logo:
Front RH: LR055323
Front LH: LR055333
Buying tip: UK exporters on eBay routinely break up full factory sets and list the front white-logo pieces separately, which is often the cheapest route into a genuine set.
No, for two reasons. First, flap suppliers vary a lot by region — depending on where you are, your local source is very likely cheaper than anything we could box and ship you. Second, there are a lot of Defender flap designs out there and our brackets fit essentially all of them, so we'd rather you pick the ones you want than have us pick for you.
Yes — stainless steel hardware ships with every kit. Nothing in the mounting stack is going to rust and nothing is going to seize into the aluminum.
Yes. Front pair, rear pair, or the full set, each in bare aluminum or satin black powder coat. The most common reasons to split it: you're running 35s and don't need the rear bracket kit at all.
The factory plastic fatigues from UV exposure, flex, and rock strikes — after a season or two the mounting corners rip through. The stamped steel bracket behind it rusts out on its own schedule. Once either one lets go, the flap folds under, catches, and the other one follows.
If your truck sees salted roads, yes — and not just for the truck. The small factory flap lets a lot of the brine slurry off your tires reach the rockers, doors, and steps, which are the exact surfaces you brush against getting in and out. The full-size Defender flap intercepts far more of that spray, so less of it ends up on the body, on the step, and on your clothes. You dress for mud on the trail; you don't dress for it on the way to work. We won't tell you it stops corrosion — nothing on a wheel arch does — but keeping the worst of the winter spray off the sides of the truck is a real, everyday difference.
No. CNC-bent 5052 aluminum, stainless hardware. That's the whole point — the factory steel front bracket is the part that fails first in a salt climate.
Front: remove the factory bracket, bolt ours to the same body studs, set the slots, torque down.
Rear: the factory flap is riveted to the factory rear bracket. Take the bracket off the truck first, then drill the rivets out or cut them with an angle grinder on the bench. You can do it on the vehicle — but we don't recommend the face full of grinding slag and hot metal down your shirt that comes with it.
Running 35s+: you'll drill new front mounting holes in the bracket to move the bracket rearward for clearance. See the tire size question.
The slots extend the brackets outward far enough to cover tires up to 37", even with wheel spacers, which covers the large majority of lifted D2s.
However at 35" and up the setup changes and you need less from us, not more. The fenders are already trimmed at that size, so the rear flaps screw directly to the factory rear brackets — skip our rear brackets entirely. In front, drill new mounting holes in the brackets so the bracket can move rearward for clearance. Buy the front pair only.
[INSERT PHOTO — our truck on 35s with Defender flaps on these brackets]
Bare is mill-finish 5052 — never rusts, but it's silver. If you want black, scuff it and rattle can it; aluminum takes paint fine. The satin black powder coat is the same bracket with that step already done, to a finish that holds up better than spray and won't chip off when a rock finds it.
Either. The aftermarket copies use the same mounting pattern as genuine Defender flaps, and nothing in our kit touches the face of the flap, so the logo stays clean on both.
If it's the fronts, this kit already replaces them — that's what the front brackets do.
If you need stock replacements for the rear so our brackets have something solid to bolt to, we'll point you somewhere better than us: Rimmer Bros sells good galvanized aftermarket brackets at prices we couldn't match. UK volume on that part is far higher than anything we'd ever run.
Mudflap Bracket Rear RH — CAX100200
Mudflap Bracket Rear LH — CAX100210
Rimmerbros.com has both OEM and aftermarket — we recommend the aftermarket galvanized if you're replacing due to rust.


How to get combined shippng with Extinct Motorsports Order and Inline Thermostats order